Unreal Reference
Supported Versions: Unreal 5.1, 5.2, 5.3, 5.4, 5.5, 5.6, 5.7
Key Bindings
For security reasons, OmniStream does not pass through all input from the web browser, keys have to be explicitly enabled in the plugin settings. A selection of standard keys (WASD etc.) are included by default, these can be removed or extra keys added in the Filtered Key List. To find out the ASCII keycode for a key you wish to use, use an online tool such as https://keycode.info/.

Audio
In Unreal OmniStream audio is handled automatically and you don't need to do anything additional in your project.
Blueprints
The OmniStream Blueprint nodes can be found here:
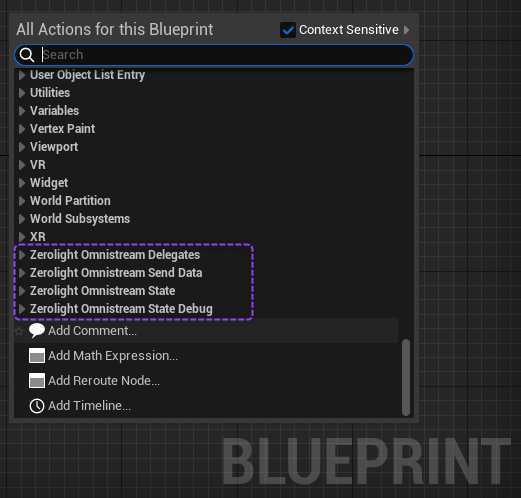
The file GameModeBase_OmniStreamExample.uasset contains an example game mode blueprint showing how to correctly use OmniStream functions.
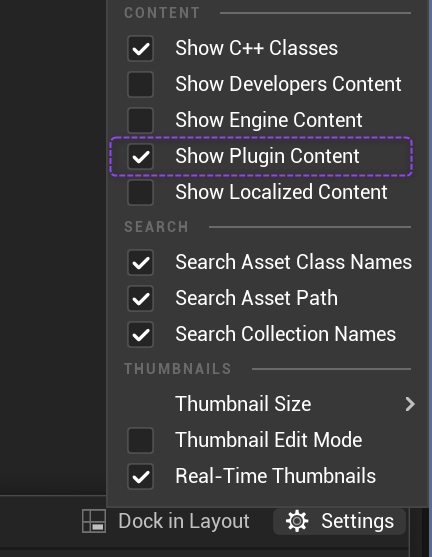
Make sure you have "Show plugin content" enabled, this is found in the Content Browser settings.
Connected
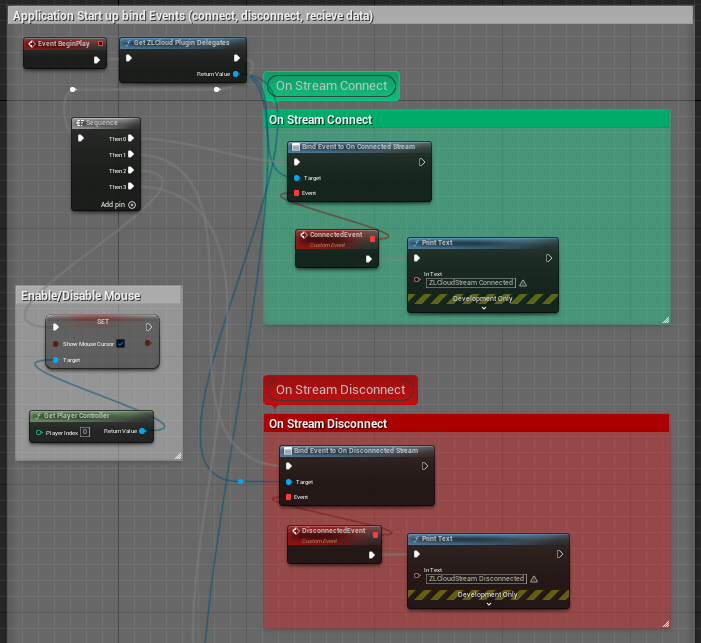
ZeroLight Omnistream Delegates → On Connected Stream
Triggered when a user connects to a stream. This is where the experience should be started, into camera sequences triggered, onboarding information displayed etc.
Disconnected
ZeroLight Omnistream Delegates → On Disconnected Stream
Triggered when a user disconnects from a stream for any reason (e.g. browser close, connection drop). This is where any cleanup/resetting of the experience needs to be done, so the experience is ready when the next user connects. When debugging locally the OmniStream systems that normally call this do not run, to simulate this from the browser, call cloudstream.disconnect() from the browser console.
Send Data
ZeroLight Omnistream Send Data → Send Data
Where messages can be sent to the web page hosting the stream. As with Receive Data the content of the messages is an open JSON schema. This can be used to let the web page hosting the stream know something has happened in the experience.

Receive Data
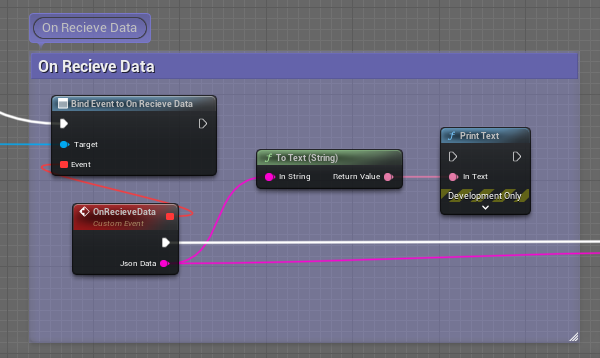
ZeroLight Omnistream Delegates → On Receive Data
Where messages sent from the web page hosting the stream are received. The content of these messages is JSON data, but the schema for the data is not defined by ZeroLight and can be used for whatever data makes sense for your experience. Examples might include UI that is outside of the stream, or for the user to pass some custom text to the experience.
It is advisable to always pass received data into the state manager, this ensures that it is aware of all changes to your scene and will enable you to use advanced features like Image on demand and session sync.
State Management
ZeroLight Omnistream State → Process State
For information on the fundamentals of state in OmniStream click here.
Upon receiving data from the web page the JSON should be sent into the state manage to process the state.
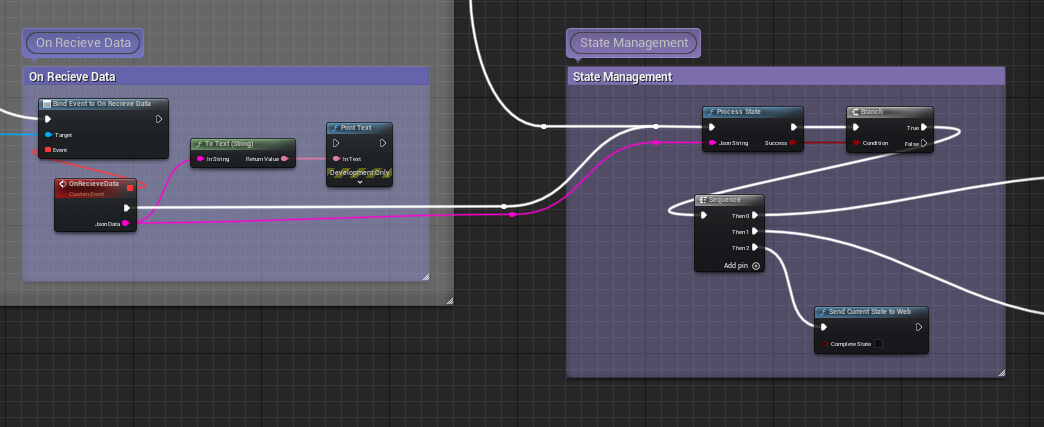
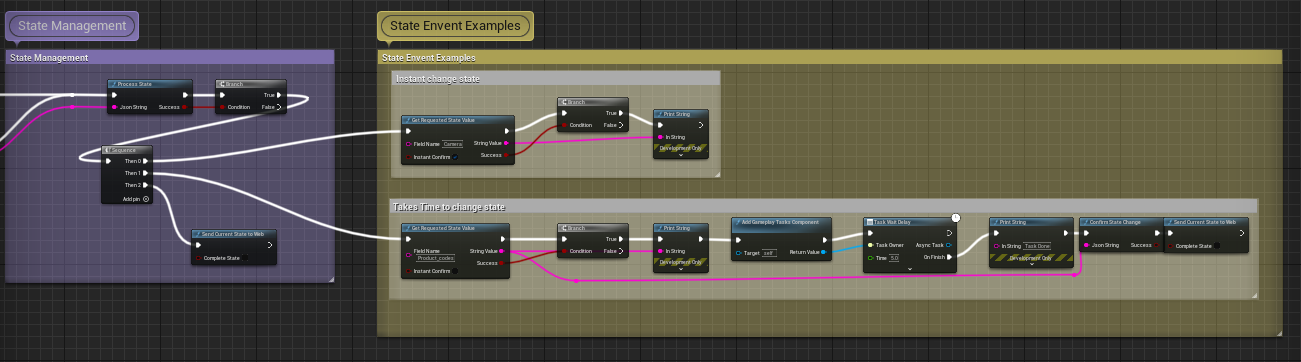
Once the state is processed successfully, the "Get Requested State Value" function is used to query if the string key for that command should be processed and the necessary action taken.
State Schemas
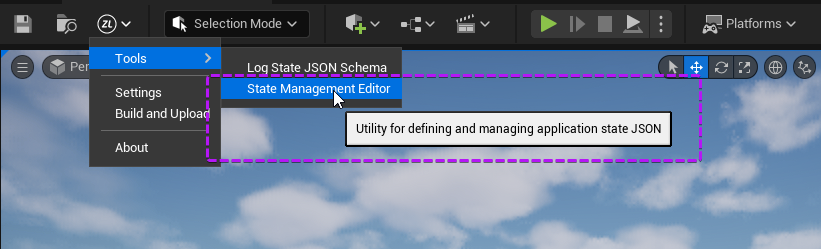
OmniStream supports the creation of State Schema assets in Unreal to simplify the definition/management/integration of new state fields within your application. Multiple schema assets can also be used within a single project to segment state into app-section relevant portions. Define and create new schema assets through the State Management Editor:
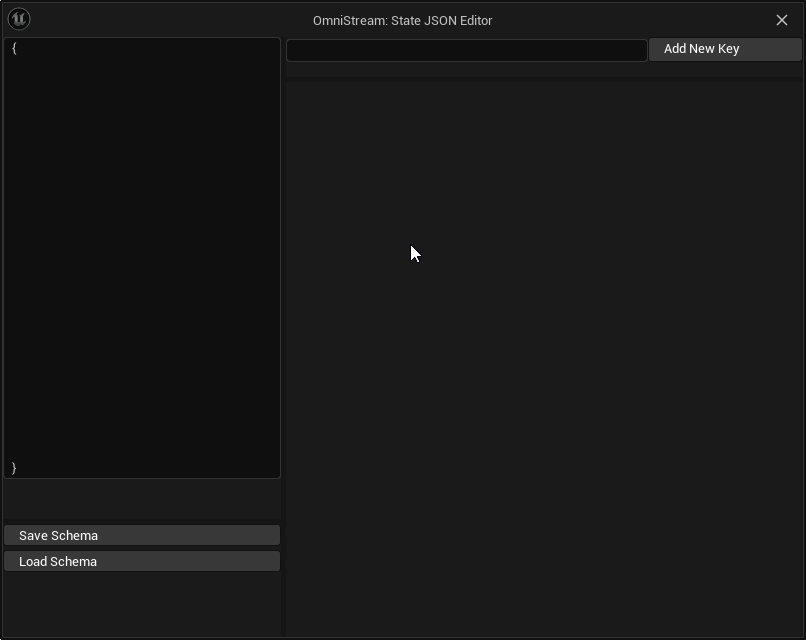
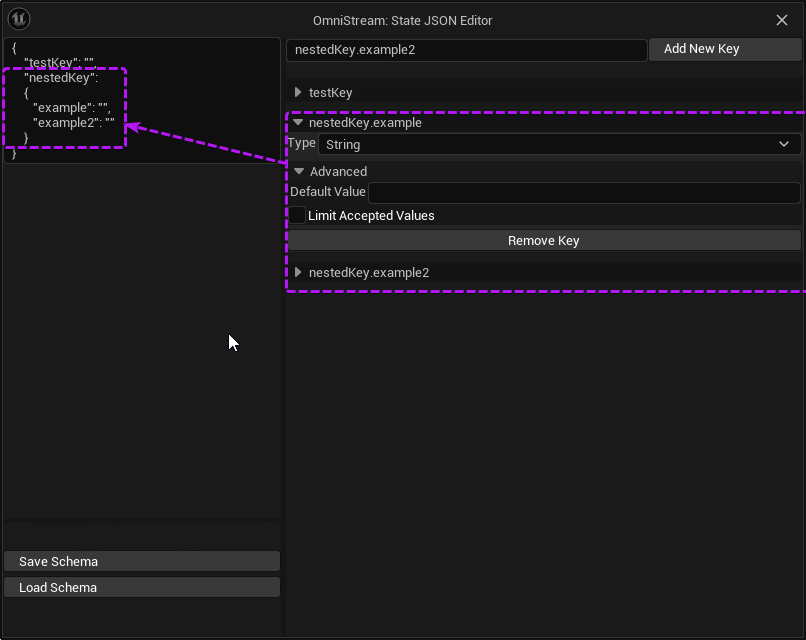
In the left text field of this editor you can paste existing defined JSON to automatically create keys for a schema. For creating a schema from scratch, add new keys in the right-side with the 'Add New Key' button. The left-side will automatically update to reflect keys added or changed through this UI. Note that for creating hierarchical keys, enter a '.' delimited string for the key in the text input field.
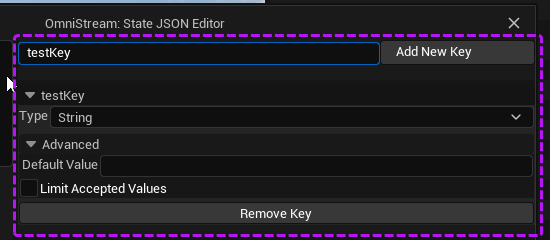
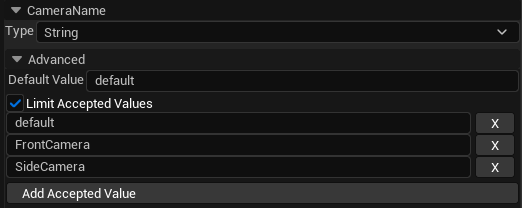
Once keys are defined in a schema, you can use the UI to define the data type, default value(s) and optionally limit the range of accepted values a key can process within the app.
After defining some keys for a schema, use the 'Save Schema' button to save this to a uasset in the project. You can also use the 'Load Schema' button to make edits to this schema at a later time.
Switching from handling state as raw JSON to using a State Schema asset enables two major benefits; simplified blueprint setup and a dynamically generated state debugging UI. When using a schema asset the following blueprint node can be used to process state requests on a key:
ZeroLight Omnistream State → Get Requested State Value (Schema Asset)
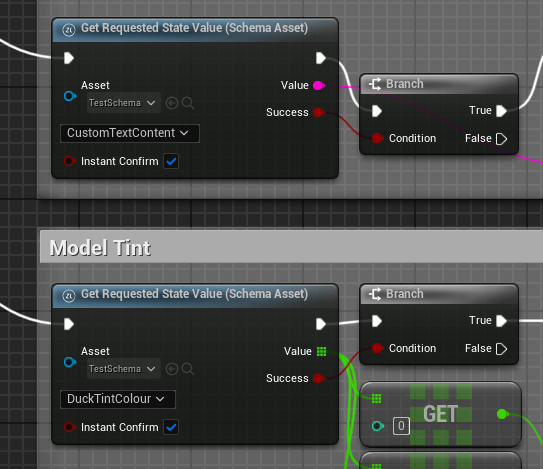
The asset selection pin provides a list of schema assets within the project, automatically populating a dropdown list of schema keys when a schema is selected, and dynamically changes the output pin to correctly match the defined key's data type.
Your application tracked state can easily be set to match the defaults in a schema using the following blueprint node:
ZeroLight Omnistream State → Set Current Schema
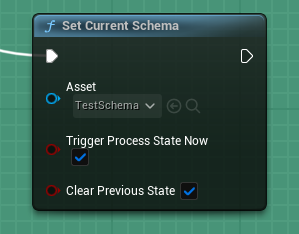
The 'Tigger Process State Now' toggle on this node can be used to trigger the entire schema as a state request to be processed in-app (if unticked this schema immediately replaces the current state without processing, i.e useful for a level switch where the state already matches the schema.) The 'Clear Previous State' toggle determines if the schema should replace the current tracked state (when ticked), or if the schema should be merged with the existing tracked state.
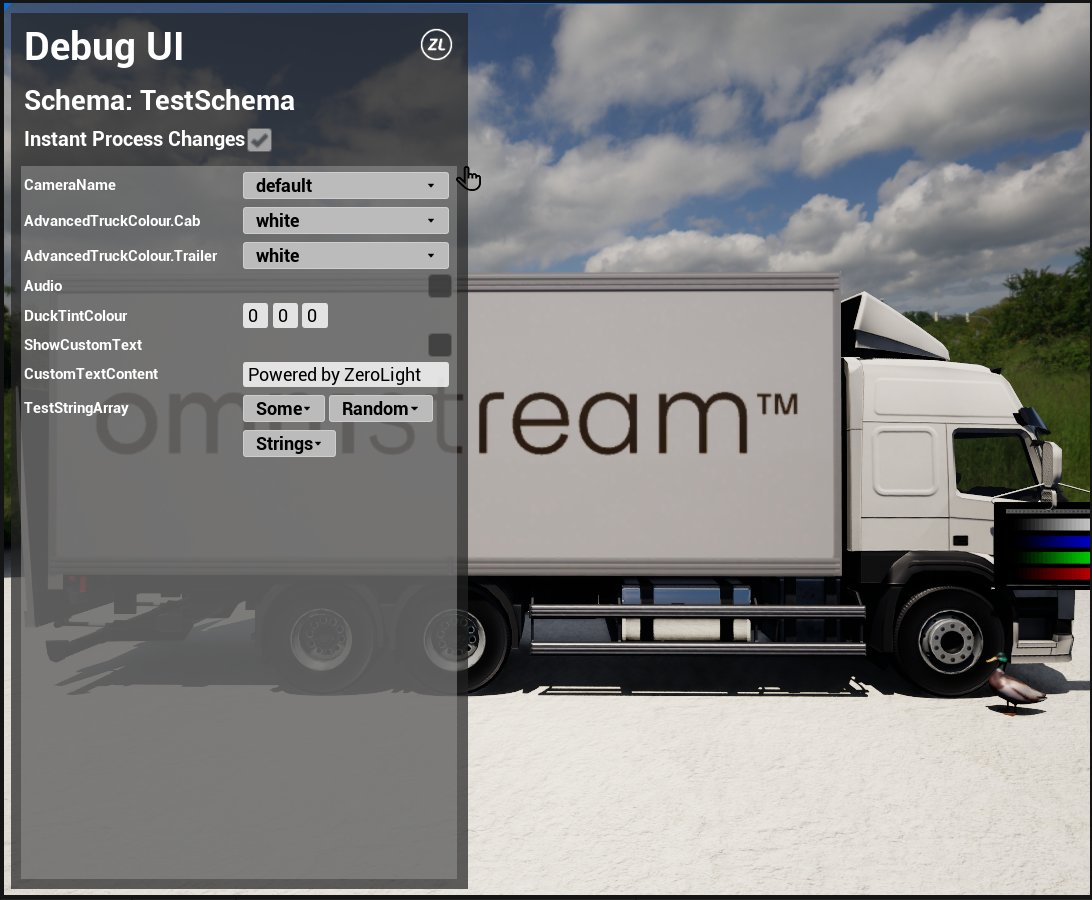
Schema Debug UI
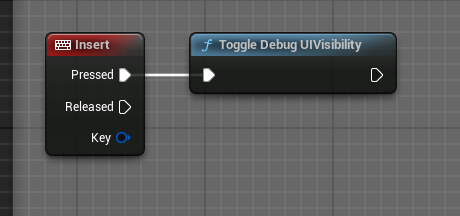
Once a state schema asset has been created (see above section) and the app uses the 'Set Current Schema' blueprint node, a dynamically generated game view UI can be toggled on. The debug UI performs changes to values by broadcasting JSON messages matching the format they would be recieved in via a stream, as such this UI streamlines quick debugging of state options and ensuring that the processing logic for state requests is functioning as intended. To enable toggling the debug UI, include the 'Toggle Debug UI Visibility' blueprint node:
Project Thumbnail
A project thumbnail can be added (The plugin auto assigns this to the thumbnail auto generated by Unreal but this can be replaced.) to display in Portal for enhanced visibility. This can be added from the plugin settings menu.

Advanced
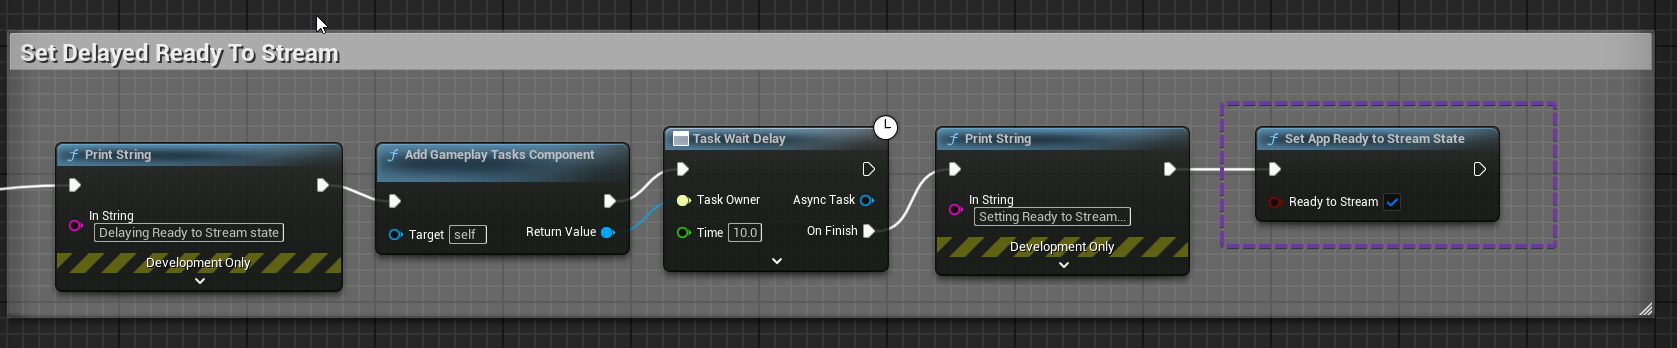
Delayed App Stream Ready
When developing an app with large amounts of initialization/async loading, you may want to delay stream adoption until a stage where all content is loaded and ready to present to avoid visible loading in the stream. This can be enabled in plugin settings:
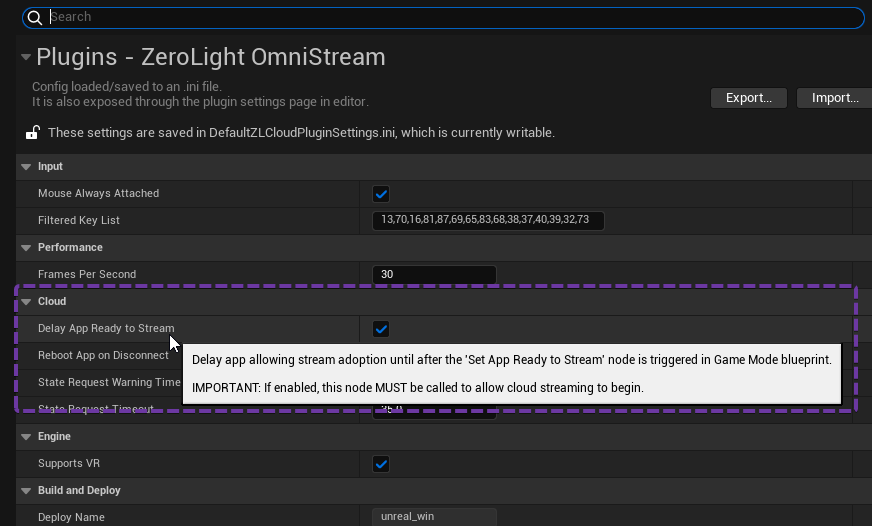
If this is enabled the Set App Ready To Stream State node must set the stream state as ready to allow streaming to begin after pre-stream loading and content setup is complete.
Default Initial Connect State
You may want to set a default JSON state so that users receive a consistent starting state on connections where no explicit onConnect state data is provided. Use the 'Set Default Initial State' BP node to configure this, providing the JSON data you want set on a connection.

If a portion of JSON state data is provided in the connection request and default state data is also set, the connection request will merge the two JSON sets, using the onConnect JSON data as an override where matching keys are in both sets. This allows connections to specify some partial state while still ensuring default state for other features of the app.
If using the toggle on the node to trigger processing this default state as soon as it is set, ensure the node is called after the On Receive Data delegate event is bound.
Connection Modes
You may want to have alternate logic for blueprints dependant on specific connection modes (I.E Making animation states play in a stream, while matching them instantly in content generation.) This is possible with the 'IsContentGenerationMode' and 'IsXRMode' nodes which return booleans to signal what the current connection is serving.
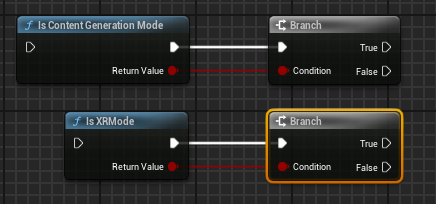
Image Mode Screenshot Delay
When operating in image mode, OmniStream inserts a small delay between the state being matched and the screenshot being rendered to give any effects time to settle. By default this is 32 frames for projects with ray-tracing enabled and 8 for projects without ray tracing. In the OmniStream settings this can be overridden by setting the Screenshot Frame Wait Count Override. If this is left as 0, the normal 32/8 frame delays are used, if it is set to a non 0 value, then that value is used.
Remove State Value
If it's necessary to remove a field(s) from the current state the Remove State Value BP node can be used to do this. For an explanation of which circumstances it might be useful to do this see Removing state fields from state.